Food
What Is Kouskousi? A Simple Guide to This Tasty Semolina Dish

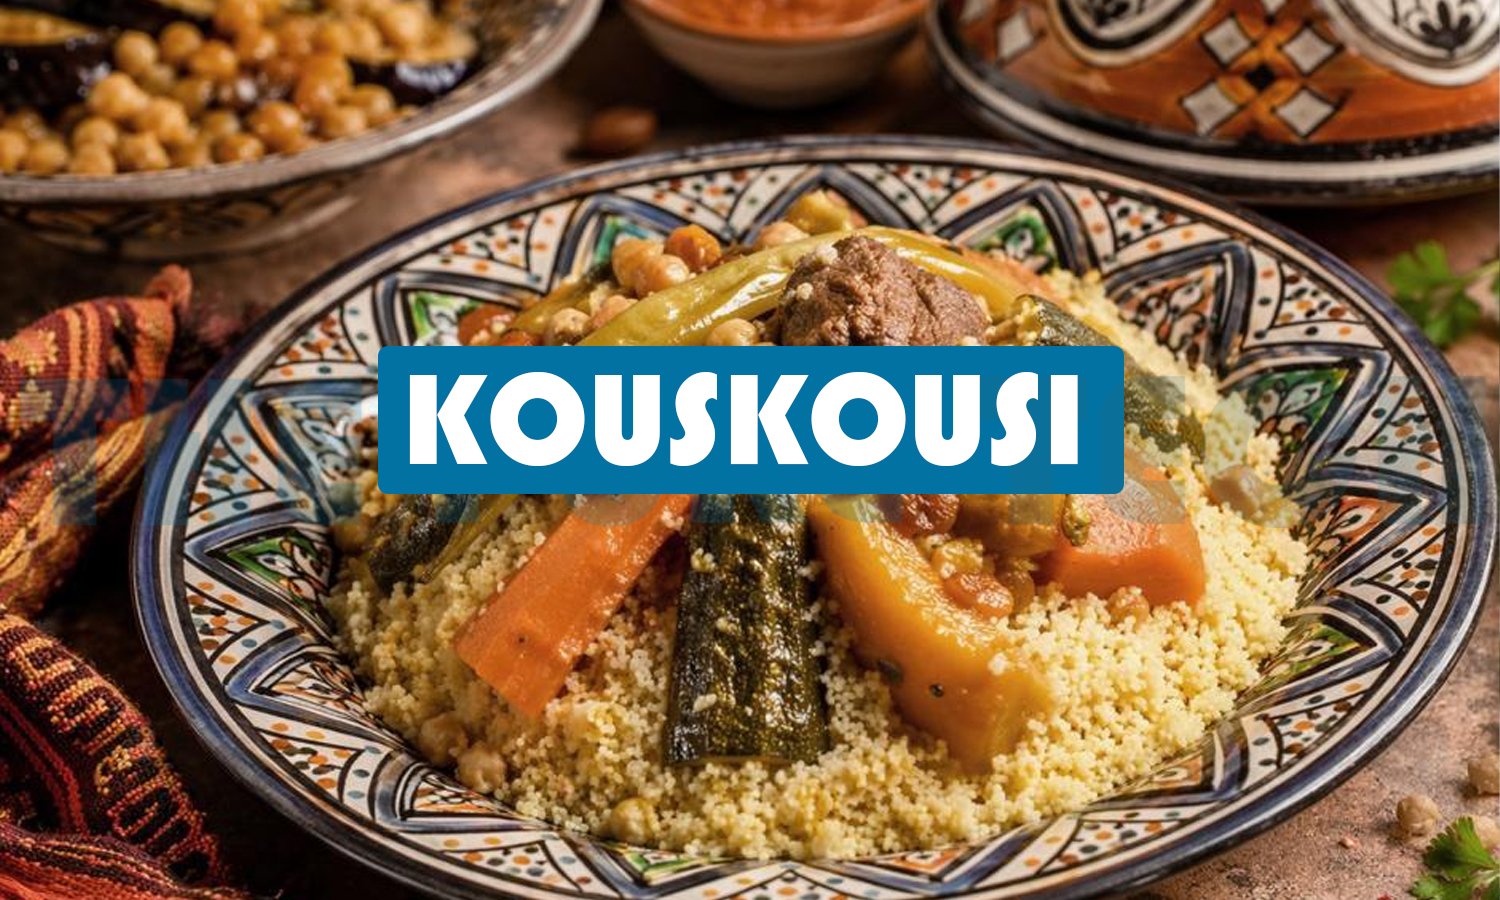
Have you ever seen the word “kouskousi” online and wondered what it means? You are not alone. Many people search for this word every day. Some think it is a new food. Others think it is a person’s name. In this article, we will explain what kouskousi really is, where it comes from, and why people love it so much.
By the end of this guide, you will know everything you need about kouskousi. You will also learn how it is made, what health benefits it may offer, and how you can try it at home.
What Does Kouskousi Mean?
Kouskousi is another way to write and say “couscous.” Couscous is a dish made from tiny grains of semolina. Semolina comes from durum wheat, which is a hard type of wheat used to make pasta and bread.
The word “kouskousi” is used in different ways around the world:
- In North Africa, it refers to the classic steamed semolina dish.
- In Greece and other Mediterranean areas, a similar word describes a small, toasted pasta that looks a bit like couscous.
- Online, some people also use it as a nickname or username, which is why you may see terms like “Kouskousi Instagram” in search results.
For this article, we will focus on the food, since that is what most people mean when they search for this word.
Where Does Kouskousi Come From?
Kouskousi has deep roots in North Africa. It is a key part of the cooking traditions of Morocco, Algeria, Tunisia, and Libya. This whole area is often called the Maghreb.
Many food historians believe the dish started with the Berber people, who are native to North Africa. They needed a meal that could feed large families and whole villages at once. Kouskousi was perfect for this. It was filling, easy to store, and simple to cook in big amounts. Over time, it became a symbol of hospitality. Families would serve it at weddings, holidays, and other special events.
Later, the dish spread across the Mediterranean and beyond. Today, you can find couscous or kouskousi in supermarkets and restaurants all over the world. Even though the basic idea stayed the same, each region added its own style. This is why there are hundreds of different kouskousi recipes today, using different vegetables, meats, and spices.
How Is Kouskousi Made?
Traditional kouskousi is not the same as instant couscous you may find in a box at the store. In its original form, it takes real skill and time to prepare.
Here is a simple explanation of the classic process:
- Rolling the semolina. Cooks mix semolina flour with a little water and roll it by hand into tiny balls.
- Steaming. The tiny grains are placed in a special pot called a couscoussier. This pot has two parts. The bottom holds a stew of vegetables, meat, or spices. The top part is a steamer basket that holds the semolina.
- Repeating the steps. The semolina is steamed, then taken out and gently broken apart with the fingers or a fork. Water is added again, and the grains are steamed a second or third time. This makes the grains light and fluffy instead of clumpy.
- Serving. Once the grains are soft and fluffy, they are placed on a large plate. The stew, vegetables, and meat are added on top or served next to it.
Modern kouskousi, especially the kind sold in stores, is often pre-cooked and dried. This means you can prepare it much faster at home. You simply add hot water or broth, cover it, and let it sit for a few minutes.
Different Types of Kouskousi
Not all kouskousi is the same. Depending on where it is made, the size, taste, and texture can change. Here are some common types:
- Moroccan couscous: This is the smallest and most common type. It cooks the fastest and is easy to find in grocery stores.
- Israeli or pearl couscous: These grains are bigger, about the size of small peas. They have a chewy texture and a slightly nutty taste. They also take longer to cook.
- Lebanese couscous (moghrabieh): This is the largest type. It has a longer cooking time and a heartier bite.
- Greek-style kouskousi: This is a small, toasted pasta. It has a slightly different taste because the pasta is roasted before it is dried, giving it a warm, nutty flavor.
Each type works well with different dishes. Small couscous is great for quick side dishes and salads. Larger types work well in soups and stews, where they can soak up flavor over a longer cooking time.
Health Benefits of Kouskousi
Kouskousi is not just tasty. It can also be a healthy part of your diet when eaten in the right amount. Here are some benefits based on nutrition research:
1. Good Source of Energy
Kouskousi is rich in carbohydrates. Carbohydrates give your body the energy it needs for daily activities. This makes it a smart choice for lunch or dinner, especially before or after exercise.
2. Contains Plant-Based Protein
While it is not a complete protein on its own, kouskousi does provide some plant-based protein. You can boost this by adding beans, chickpeas, or lentils to your meal.
3. High in Selenium
One of the most impressive nutrients in couscous is selenium. Selenium is a mineral that acts as an antioxidant in your body. It helps protect your cells from damage and supports a healthy thyroid gland. Just one cooked cup of couscous can provide a large part of your daily selenium needs.
4. Supports Digestion
Whole wheat versions of kouskousi contain more fiber than the refined type. Fiber helps keep your digestive system working well. It can also help you feel full for longer, which may support healthy weight management.
5. Low in Fat
Plain kouskousi is naturally low in fat. This makes it a light base for many dishes. You can add healthy fats yourself, such as olive oil, nuts, or avocado, depending on your taste and diet goals.
It is worth noting that kouskousi is made from wheat. This means it contains gluten. People with celiac disease or a gluten intolerance should avoid it and choose gluten-free grains instead, such as rice, quinoa, or corn-based couscous alternatives.
Simple Ways to Enjoy Kouskousi at Home
You do not need special skills to enjoy kouskousi. Here are a few easy ideas:
- Classic style: Serve it with a vegetable stew, chickpeas, and warm spices like cumin and cinnamon.
- Salad style: Mix cooked kouskousi with chopped cucumber, tomato, parsley, lemon juice, and olive oil for a fresh, cold salad.
- With protein: Add grilled chicken, lamb, or fish on top for a complete meal.
- Sweet version: In some North African homes, kouskousi is even served as a dessert, topped with warm milk, cinnamon, and a bit of sugar or dried fruit.
Because the flavor is mild, kouskousi works well with almost any herb, spice, or sauce you already enjoy.
Final Thoughts
Kouskousi is much more than a strange word you saw online. It is a rich, traditional food with deep roots in North African and Mediterranean culture. Whether you know it as couscous, kouskousi, or by another name, this humble semolina dish has fed families for generations and continues to bring people together at the table today.
If you have never tried it, this might be the perfect time to give it a taste. Start with a simple recipe, add your favorite vegetables or spices, and enjoy a dish with real history behind it.
Frequently Asked Questions
Is kouskousi the same as couscous?
Yes, in most cases, kouskousi is just another way to spell or say couscous. Both words refer to the same type of small semolina grains, though spelling can change slightly by region and language.
Is kouskousi healthy to eat?
Yes, it can be a healthy part of your diet. It offers energy from carbohydrates, some plant-based protein, and useful minerals like selenium. Choosing whole wheat versions adds more fiber to your meal.
Does kouskousi contain gluten?
Yes. Kouskousi is made from wheat semolina, so it does contain gluten. People with celiac disease or gluten sensitivity should look for gluten-free alternatives instead.
How long does it take to cook kouskousi?
It depends on the type. Instant, pre-cooked kouskousi from the store usually takes about 5 to 10 minutes. Traditional, hand-rolled kouskousi takes longer, since it is steamed several times to make the grains light and fluffy.
For More Tech Information : The Pure Tech


If you love beef and you want a new dinner idea, you should try carne picada. This dish comes from Mexican and Tex Mex cooking. It is full of flavor, easy to make, and works for busy weeknights. In this article, you will learn what carne picada is, what you need to make it, and how to cook it step by step. We will also answer some common questions at the end.
What Is Carne Picada?
The word “picada” comes from Spanish. It means “chopped” or “minced.” So carne picada simply means “chopped meat.” In many grocery stores in the United States, you can find beef already labeled as “carne picada.” This beef is cut into small, thin pieces or shavings. It looks a bit like coarse ground beef, but the pieces are bigger.
Carne picada is popular in Tex Mex cooking, but it also has roots in Mexican cuisine. People often cook it with tomatoes, onions, peppers, and warm spices like cumin and chili powder. The beef is browned first, then simmered slowly until it becomes soft and tender. The result is a rich, saucy beef dish that you can use in many ways.
It’s worth noting that the word “picada” also shows up in other Spanish speaking food traditions. In Argentina and Uruguay, a “picada” means something different. It is a plate of small snacks like cheese, cured meats, bread, and nuts, similar to Spanish tapas or Italian antipasto. And in Catalonia, Spain, “picada” refers to a thick paste made from toasted bread, nuts, garlic, and olive oil, used to add flavor to stews. This article focuses on the Tex Mex and Mexican style carne picada, since it is the most common meaning people search for when they want a recipe.
What Cut of Beef Should You Use?
You do not need an expensive cut of meat for this recipe. Cheaper, tougher cuts work best because slow cooking makes them soft and full of flavor. Some good choices are:
- Chuck roast: This is the most common choice. It has good marbling and turns tender after simmering.
- Bottom round roast: An affordable option that also gets soft when cooked low and slow.
- Flank steak or skirt steak: These can work too, but you may need to adjust the cooking time.
- Pre cut carne picada: Some stores sell beef already cut into small strips and labeled “carne picada.” Using this can save you time.
Whichever cut you pick, cut it into small pieces or thin strips. Smaller pieces cook faster and soak up more flavor from the spices and sauce.
Ingredients You Will Need
Carne picada does not need a long list of fancy ingredients. Here is a simple version you can follow:
For the meat and seasoning:
- 2 to 3 pounds of chuck roast or bottom round roast, cut into small pieces
- 1 tablespoon cornstarch or flour (this helps the seasoning stick and helps thicken the sauce)
- 1 tablespoon ground cumin
- 1 to 2 teaspoons chili powder
- 1 teaspoon garlic powder
- 1 teaspoon smoked paprika
- 1 teaspoon dried oregano
- Salt and black pepper to taste
- A pinch of cayenne pepper, if you like some heat
For the sauce:
- 2 tablespoons cooking oil
- 1 chopped onion
- 3 cloves of garlic, minced
- 1 bell pepper, chopped (red or green)
- 1 jalapeño, chopped (optional, leave out if you do not like spice)
- 1 can of diced tomatoes, or fire roasted tomatoes with chilies
- 1 cup beef broth
You can adjust the spice level to fit your taste. If you are cooking for children or people who do not like heat, simply skip the jalapeño and cayenne pepper.
How to Make Carne Picada Step by Step
Step 1: Season the Meat
In a large bowl, mix the cornstarch (or flour) with cumin, chili powder, garlic powder, paprika, oregano, salt, and pepper. Add the beef pieces and toss them until they are well coated. If you have time, let the meat sit for about 30 minutes to 2 hours. This gives the spices more time to soak into the meat, but you can also cook it right away if you are short on time.
Step 2: Brown the Beef
Heat the oil in a large pot or deep pan over medium high heat. Add the beef in a single layer, so the pieces do not stick together. Let the beef cook until it turns golden brown on the outside, about 6 to 8 minutes. You may need to do this in two batches so the pan is not too crowded. Browning the meat adds a deep, rich flavor to the dish, so try not to skip this step.
Step 3: Cook the Vegetables
Once the meat is browned, add the onion, garlic, bell pepper, and jalapeño (if using) to the same pot. Cook for about 5 to 8 minutes, stirring often, until the vegetables become soft.
Step 4: Add Tomatoes and Broth
Pour in the diced tomatoes and beef broth. Stir everything together and scrape up any browned bits stuck to the bottom of the pot. Those bits carry a lot of flavor.
Step 5: Simmer Until Tender
Bring the mixture to a boil, then lower the heat so it gently simmers. Cover the pot and let it cook for about 30 to 45 minutes, or until the beef is soft and tender. Stir occasionally to make sure nothing sticks to the bottom. If the sauce looks too thin, remove the lid for the last 10 minutes so it can thicken. If it looks too thick, add a small splash of broth or water.
Step 6: Taste and Serve
Before serving, taste the dish and add more salt, pepper, or spice if needed. Let it cool for a few minutes, then serve it warm.
Other Ways to Cook Carne Picada
You do not have to use the stovetop. Carne picada also works well in other cooking methods:
- Slow cooker: Brown the meat first, then place everything in the slow cooker. Cook on low for about 6 hours or on high for about 3 hours.
- Instant pot or pressure cooker: After browning the meat and cooking the vegetables, seal the pot and cook on high pressure for about 30 to 45 minutes. Let the pressure release naturally for the best texture.
Both methods give you tender, flavorful beef without much extra effort.
How to Serve Carne Picada
One of the best things about carne picada is how many ways you can use it. Here are some popular ideas:
- Tacos: Spoon the beef into warm corn or flour tortillas. Top with onion, cilantro, and a squeeze of lime.
- Burritos: Wrap the beef with rice, beans, and cheese in a large flour tortilla.
- Rice bowls: Serve the beef over rice with your favorite toppings, like avocado, sour cream, or salsa.
- With beans and rice: Serve it as a main dish next to Mexican rice and refried beans for a simple, filling meal.
- Nachos: Spread the beef over tortilla chips with melted cheese for a quick snack or party food.
Tips for the Best Carne Picada
- Cut the meat small: Smaller pieces cook faster and soak up more flavor.
- Do not skip browning: This step builds flavor that you cannot get any other way.
- Use fresh garlic and onion: Fresh ingredients give a better taste than powdered versions, when possible.
- Let it rest: Like many stews, carne picada often tastes even better the next day, after the flavors have had time to blend.
- Store leftovers properly: Keep leftovers in a sealed container in the fridge for up to 4 days, or freeze for up to 3 months.
Final Thoughts
Carne picada is a simple, budget friendly beef dish that brings big flavor to your table. It works for busy weeknights, casual family dinners, or even taco night with friends. Once you understand the basic method, browning the meat, cooking the vegetables, and simmering everything together, you can easily change the spices or heat level to match your own taste. Give this recipe a try, and you may find it becomes one of your regular go to meals.
Frequently Asked Questions
What does “carne picada” mean?
“Carne picada” is a Spanish phrase that means “chopped meat” or “minced meat.” In grocery stores, it usually refers to beef cut into small, thin pieces.
What is the best cut of beef for carne picada?
Chuck roast is the most popular choice because it becomes tender after slow cooking. Bottom round roast and flank steak also work well.
Is carne picada the same as ground beef?
No, they are different. Ground beef is finely minced, almost like a paste. Carne picada is cut into small strips or chunks, so it has more texture and bite.
Can I make carne picada ahead of time?
Yes. In fact, many people think it tastes even better the next day because the flavors have more time to blend. You can store it in the fridge for up to 4 days or freeze it for later use.
For More Tech Information : The Pure Tech

What Does Jememôtre Mean? A Simple Guide to This New Word

Revolvertech Gaming: Your Simple Guide to Game Reviews, Tips, and News

NYT Connections Hint Today: Easy Clues from Mashable to Help You Win

-

 Technology2 months ago
Droven.io Enterprise Tech Innovation: A Simple Guide to Business Growth with Modern Technology
-

 Tech Reviews2 months ago
Zingyzon.com Review: Is This Website Safe or a Scam?
-

 Tech2 months ago
What Is WiseStudySpot.com? A Simple Guide to This AI and SEO Blog
-

 Tech2 months ago
What Is Kinervus? A Simple Guide to Nerve and Body Movement
-

 Blog2 months ago
What Is Merfez? Simple Meaning and Uses Explained
-

 Technology2 months ago
Droven.io New Gadgets 2025: Smart Devices That Make Life Easier
-

 Blog2 months ago
What Is a Cadibara? The Fun Nickname for the World’s Biggest Rodent
-

 Technology2 months ago
What is LCFTechMods? A Simple Guide for Beginners